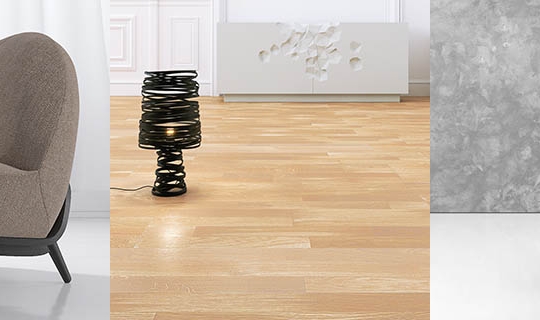
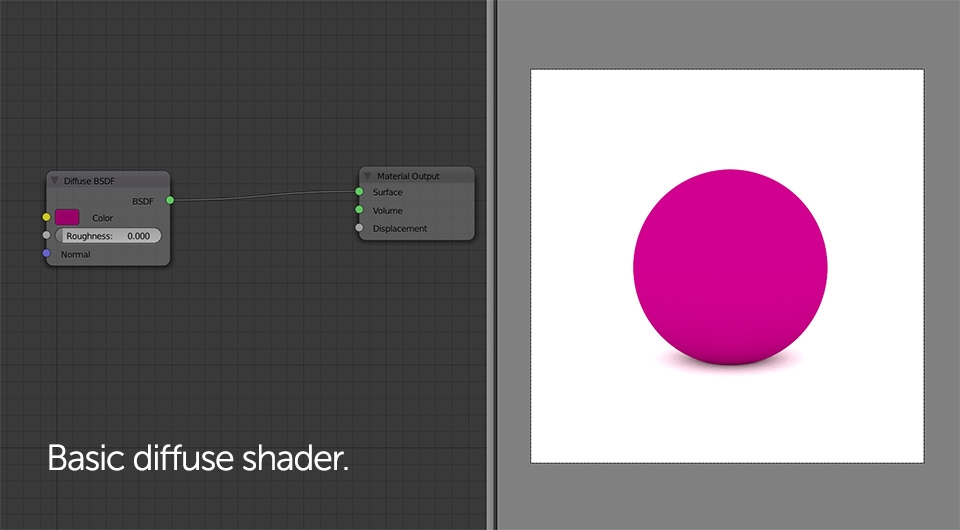
Cycles material system is quite unique comparing it to other rendering engines available on the market. Despite of giving user a pre-made shaders with some basic adjustments available (diffuse color, reflectivity and glossiness values etc.) it allows us to create shaders basically from the scratch in a way we really want to. This means we can either try simulating physically based materials or creating something that would never exist in reality.
Speaking of physics, it is very common that people try achieving as physically correct results as possible, assuming that's the secret "key" to a good quality rendering. Well, I disagree with that and the best argument against is real photography - although it's 100% physically accurate, you need to put some effort to have a great picture. In my opinion nice looking, realistic effects can be achieved in many different ways. It's really up to user and depends on the project you work with.


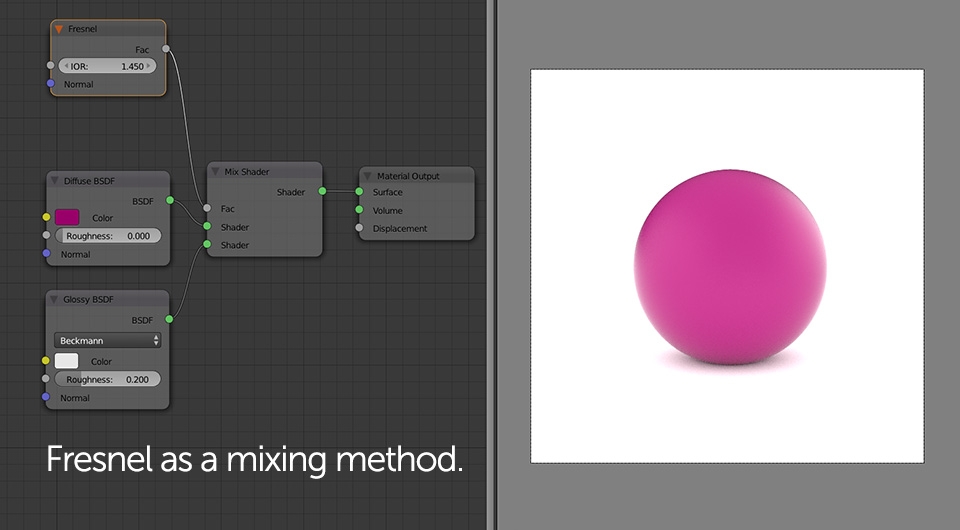
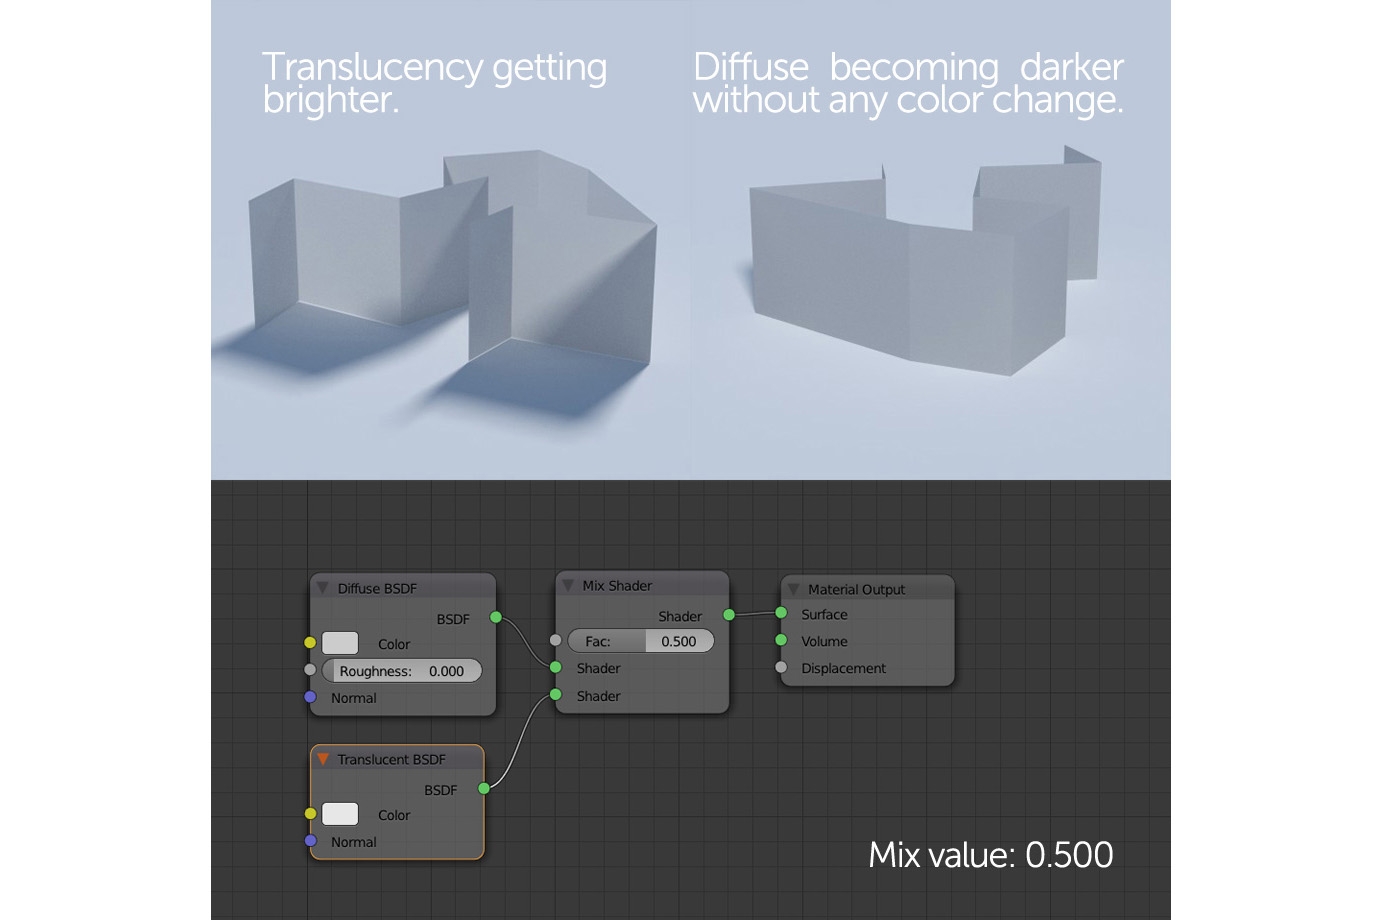
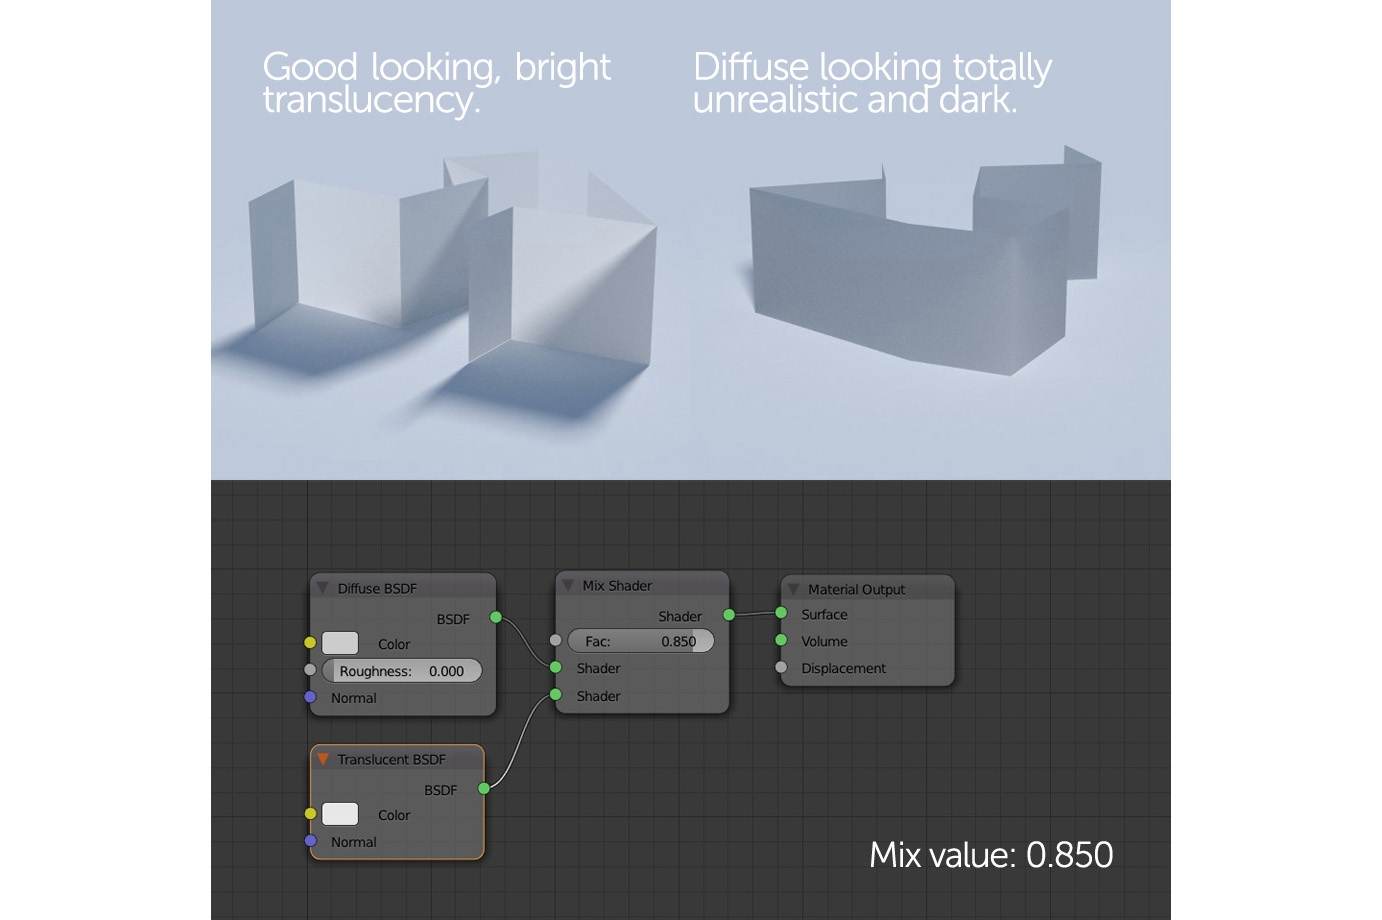
Mix Shader will be one of your most often used nodes as it allows mixing two other shading nodes in various ways. You can use different Input Nodes to define the method of mixing or just use 0.0 = 1.0 values that are available by default. Probably the most common "Mix" use is adding reflections to the basic diffuse shader by using Fresnel or Layer Weight Input nodes.
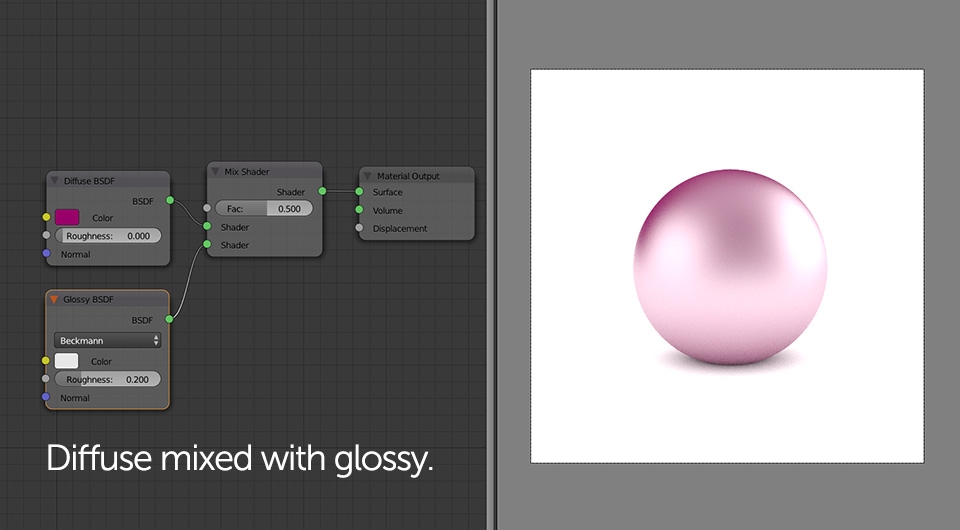
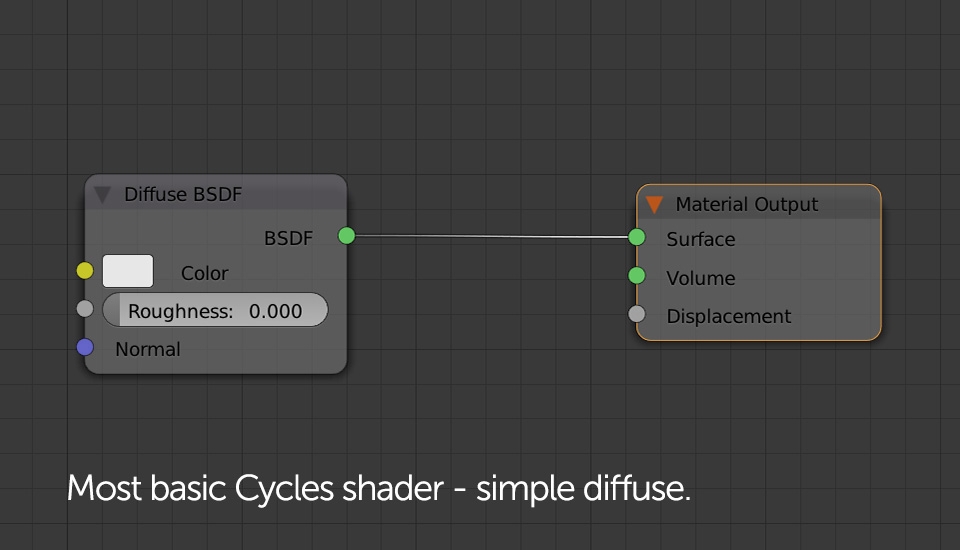
As shortly mentioned earlier - a good way of quickly understanding the philosophy behind Cycles material system is thinking of Shader Nodes as real life material attributes you'd like to add to your CG shader. In the example above we've added "reflectivity" to very plain, uninteresting, single colored shader. By using additional Mix Shader Nodes we can add more attributes such as opacity (by mixing Transparent Shader node) or create interesting, non physical effects.

For correct reflections it is recommended to use Layer Weight node with its "Facing" output - this method is geometry independent and will always produce correct results. To have a better control over the reflections you should use RGB Curve Color node. This is very common practice and is widely used in other rendering engines.


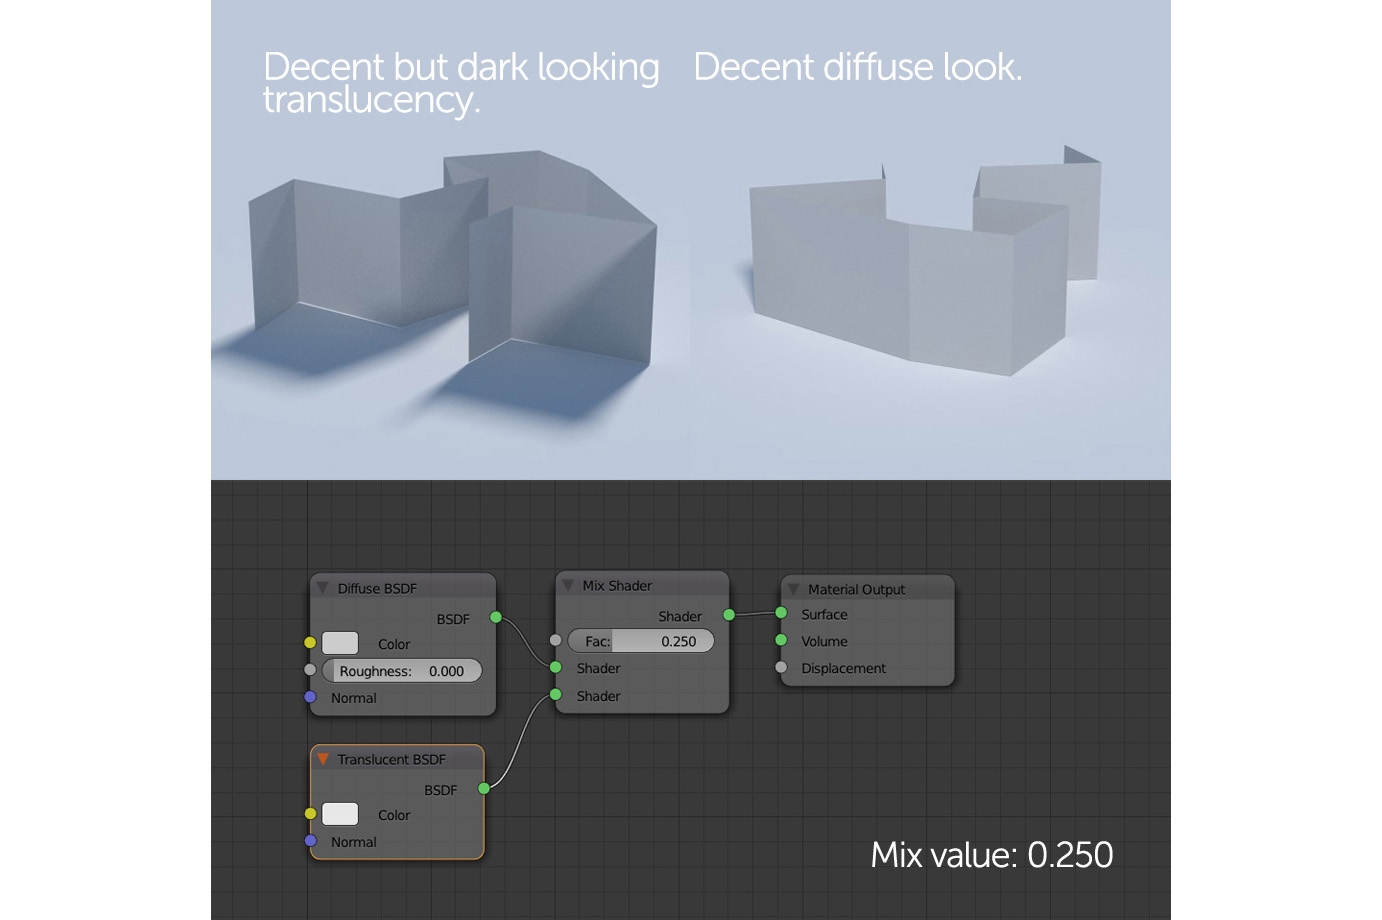
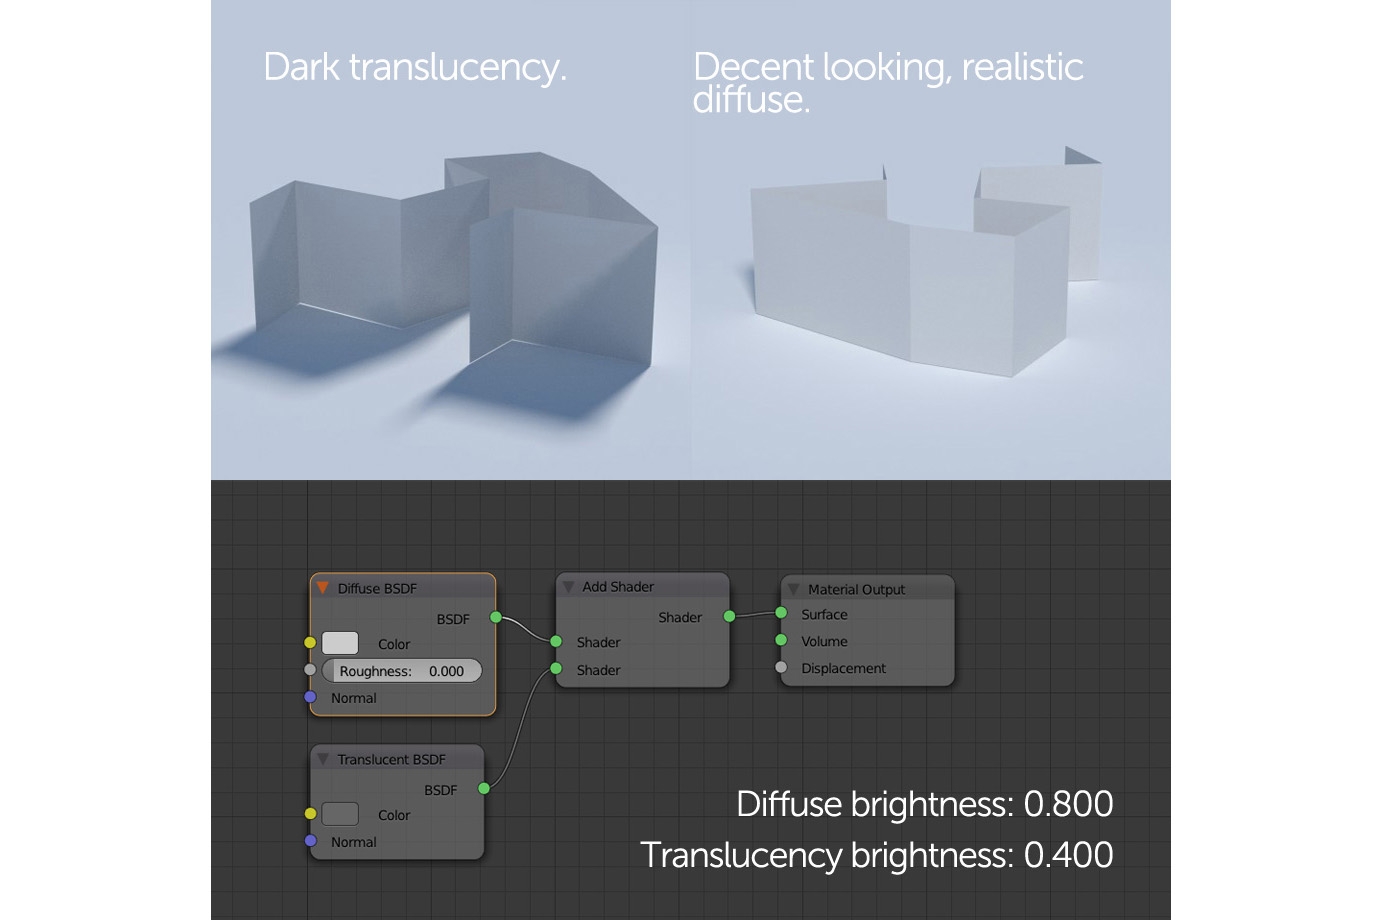
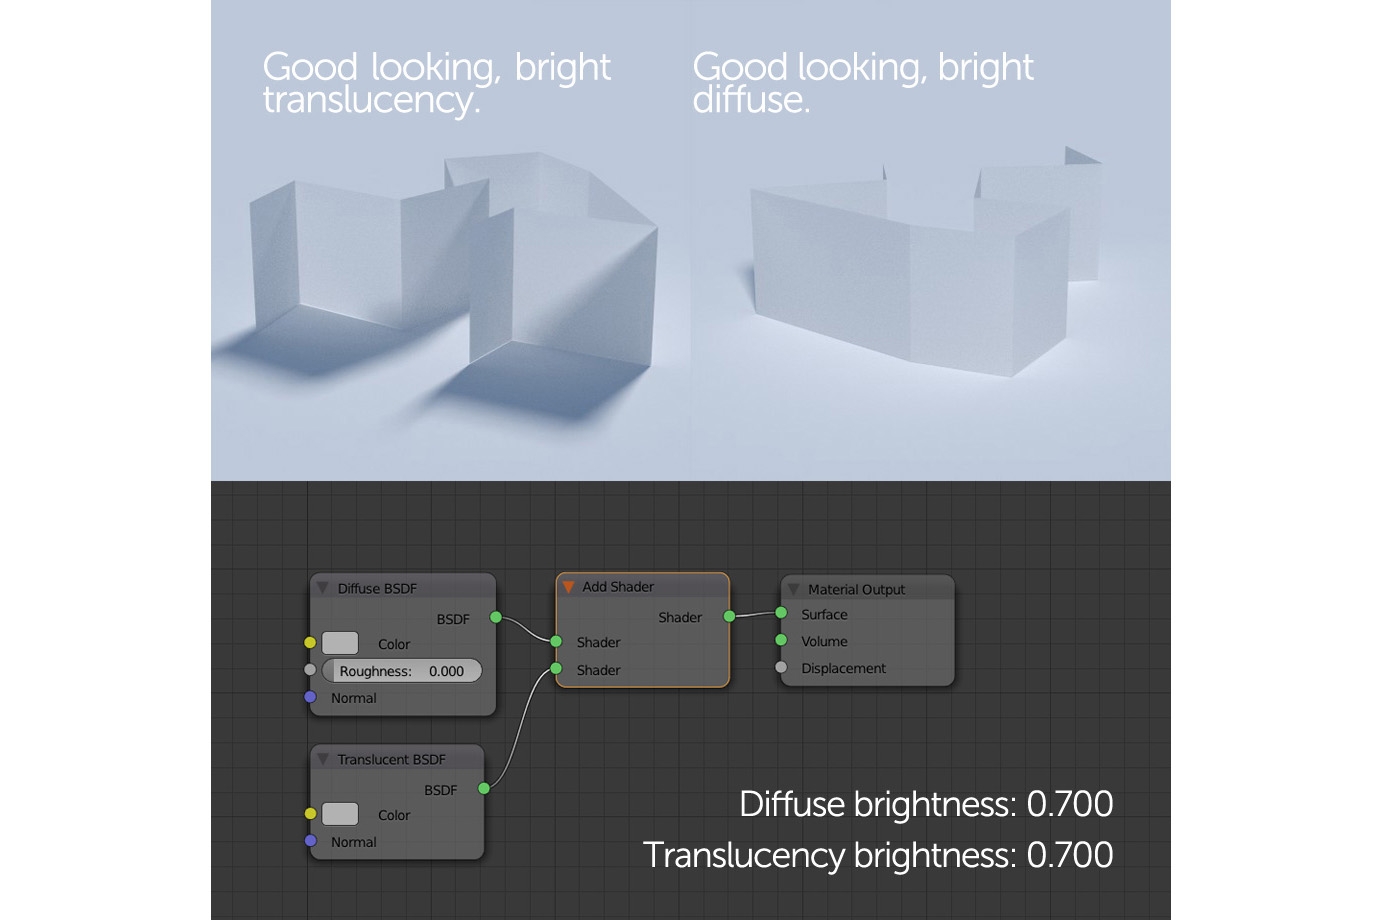
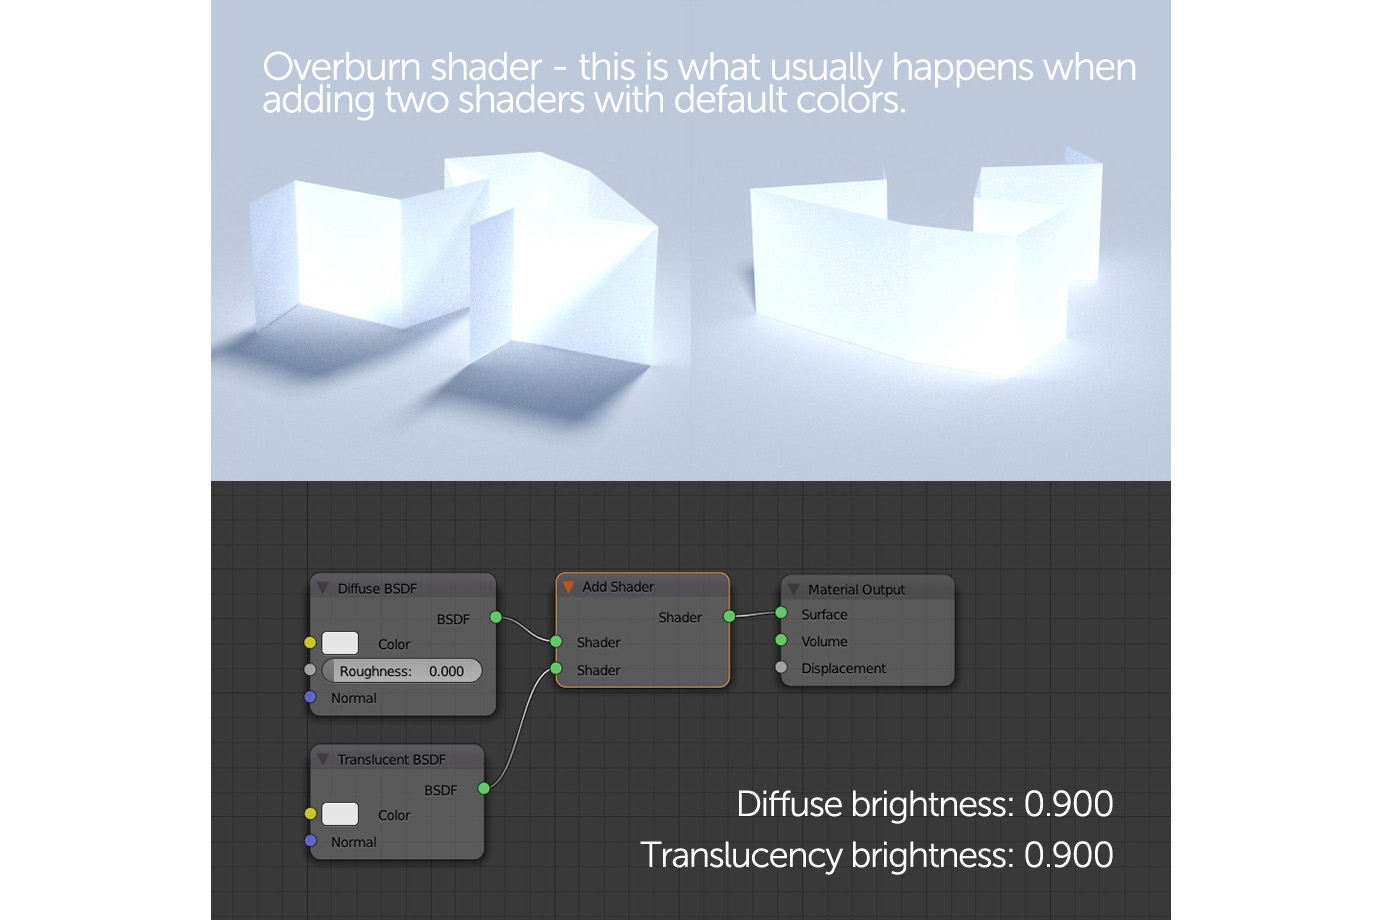
Add Shader node seems to work a bit different and is not as popular as Mix Shader node. Its function is similar - combining two different shaders together. However In my opinion both of these nodes should be used for different purposes and some materials can be only created with Add Shade node.
In difference to Mix Shader this node does not actually "mix" two material properties in certain way. It adds them together which results in completely new "shading" output. For instance, if we add Diffuse to Translucency we'll get a new shader bearing both of these material properties. They cannot be mixed in any way and the new shader is 100% diffuse and 100% translucent. It's totally different to mixing Diffuse and Translucency in 50 to 50 ratio using Mix Shader. The output in this instance would be 50% Diffuse and 50% Translucent. It may sound a bit confusing but a good real life example is single grass blade or a piece of paper. We consider them both to be 100% diffuse which is true but if you put a strong light source behind, a 100% translucency effect will be visible. This makes us think that these materials are both 100% diffuse and 100% translucent.
Another interesting thing about Add Shader is that it counts all black color/shading values as zero. This means they will be added to the first shader but won't affect it in any way. We can use this for creating fabric materials by adding Velvet shader to Diffuse. Another useful trick could be enhancing standard Glass shader by adding some Transparency to it.
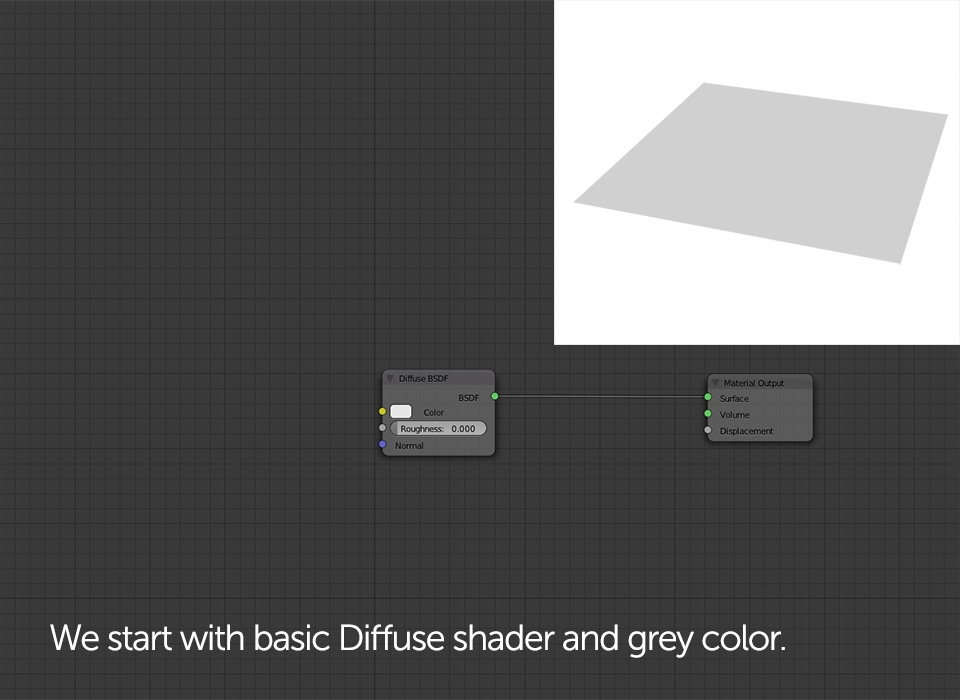
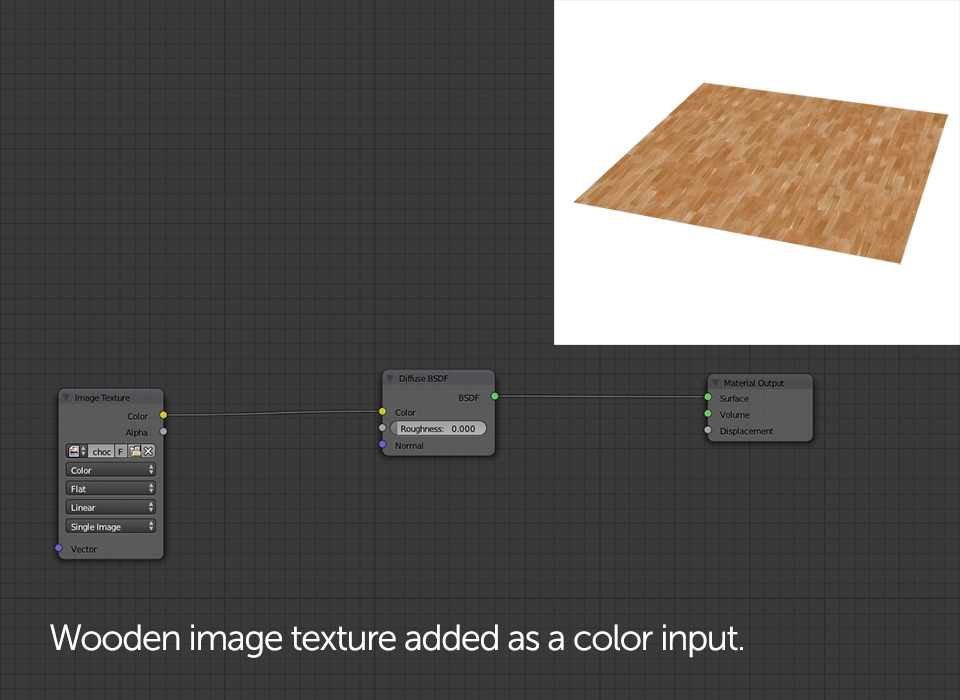
So far we've been using only solid colors for creating our shaders. In many cases this works actually fine but for re=creating more advanced materials in CG reality we'll need to use texture maps. Adding image texture to your Cycles shader is pretty easy but should be also supported by few additional color nodes.

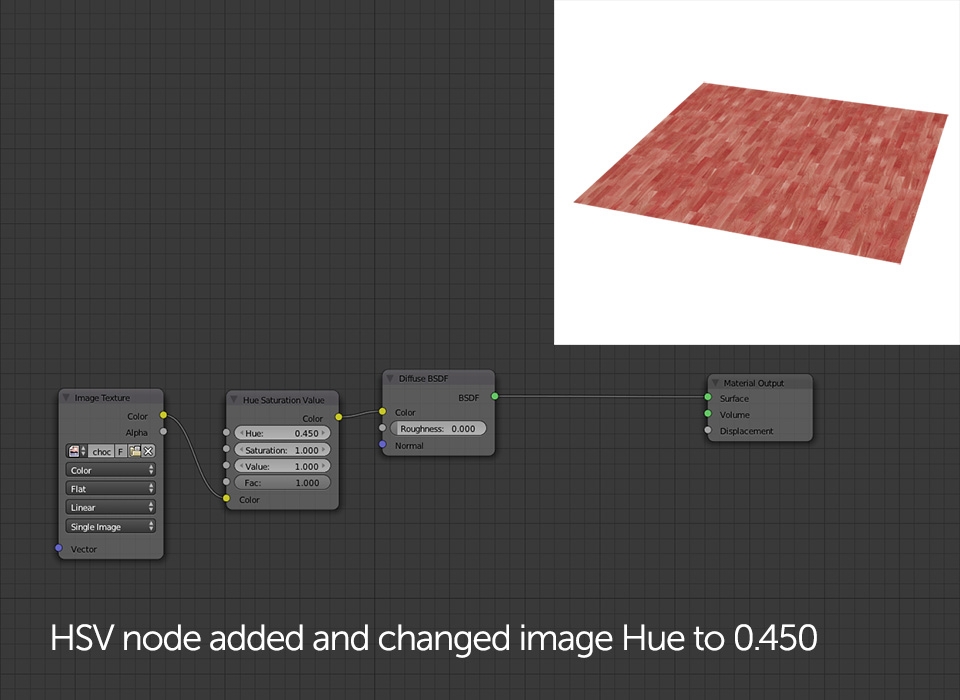
What you can see above is a quick node setup I use very often when adding image textures to my shaders. Already mentioned RGB Curves are one of the most usable nodes you should know - they work much better with changing texture brightness or contrast than all the other available Color Nodes. It is also advised to add Hue / Saturation / Node for fine adjustments as the final image texture color displayed in Cycles does not always match what you see in your 2D editing software.
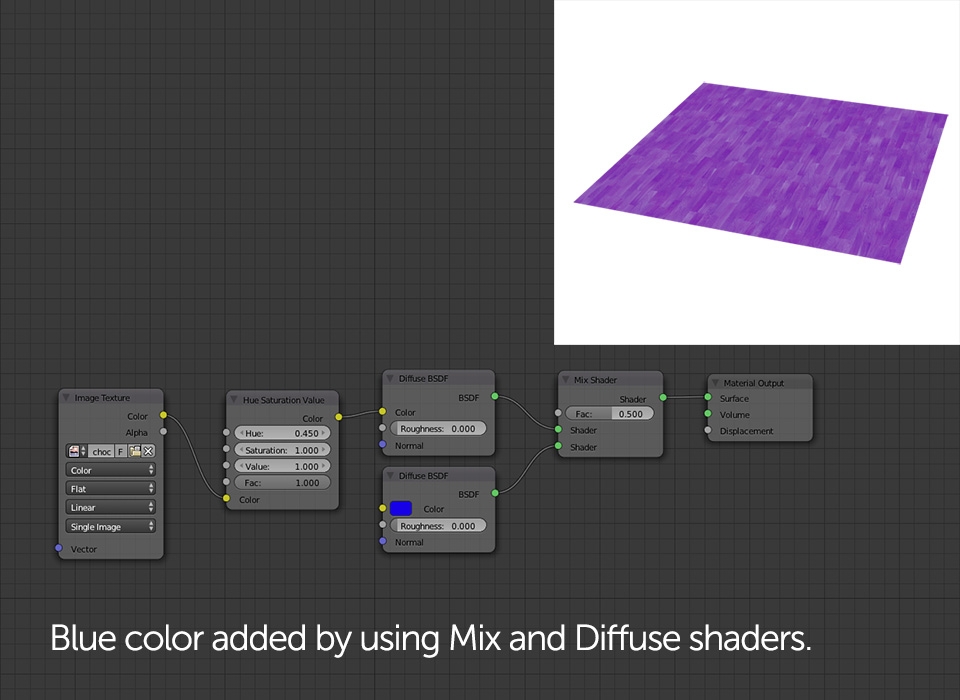

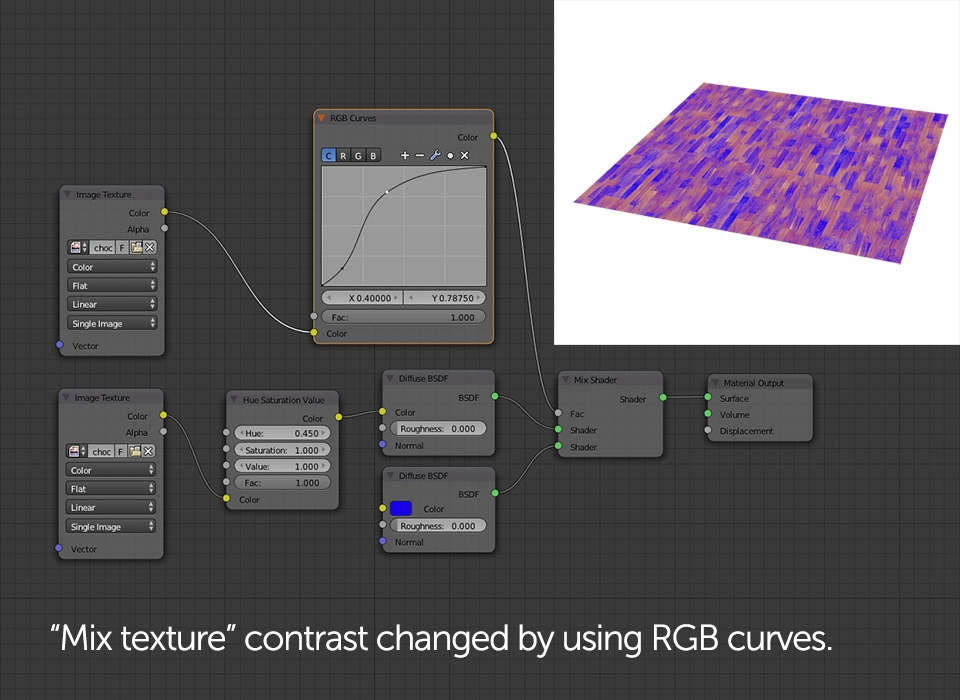
It is important to roughly understand how rendering engines interpret image files. Without getting much into technical details, it can be roughly said that white color represents 100% of any value, while black means "zero" or "nothing". This can be observed in the picture number 5 above: you can see blue diffuse shader being visible in areas where image texture color is close to being white. I've used RGB Curves to increase the contrast and make the effect even more visible. Since in CG world all material attributes are expressed by wide spectrum of values between 0.0 and 1.0, we can use image textures for defining shader's reflectivity, transparency, roughness etc.

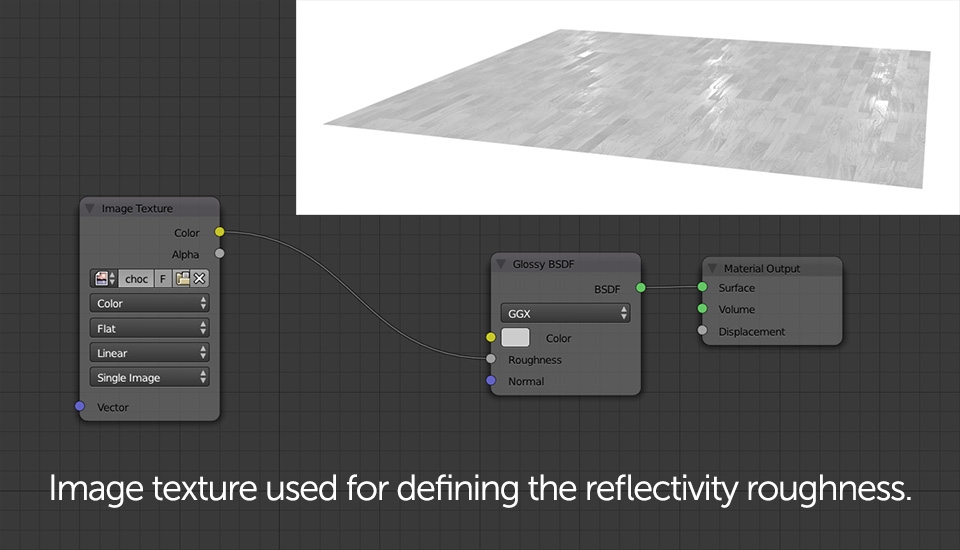


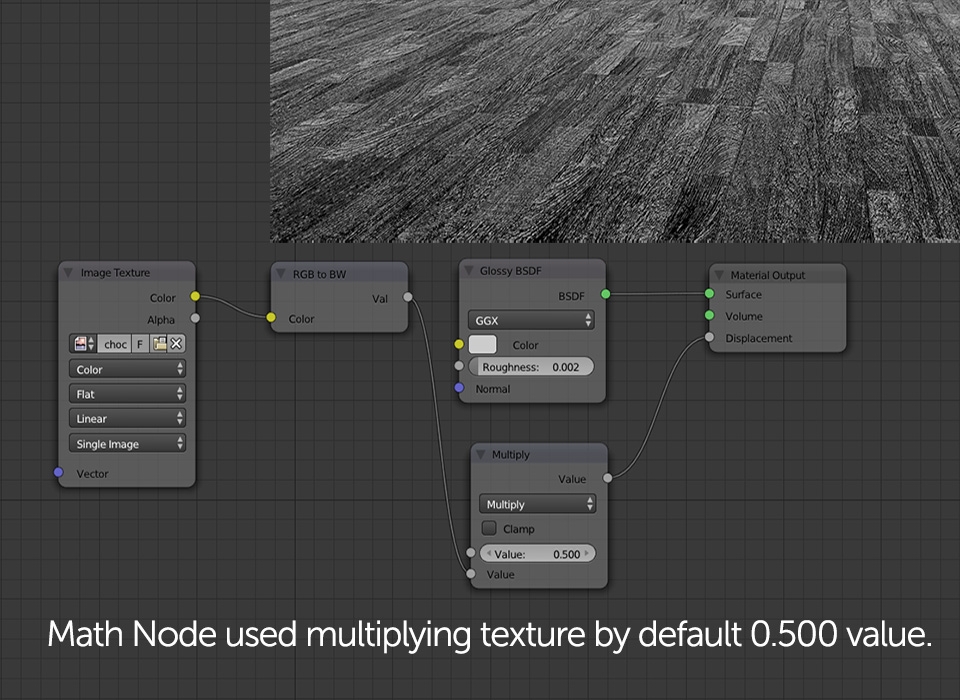
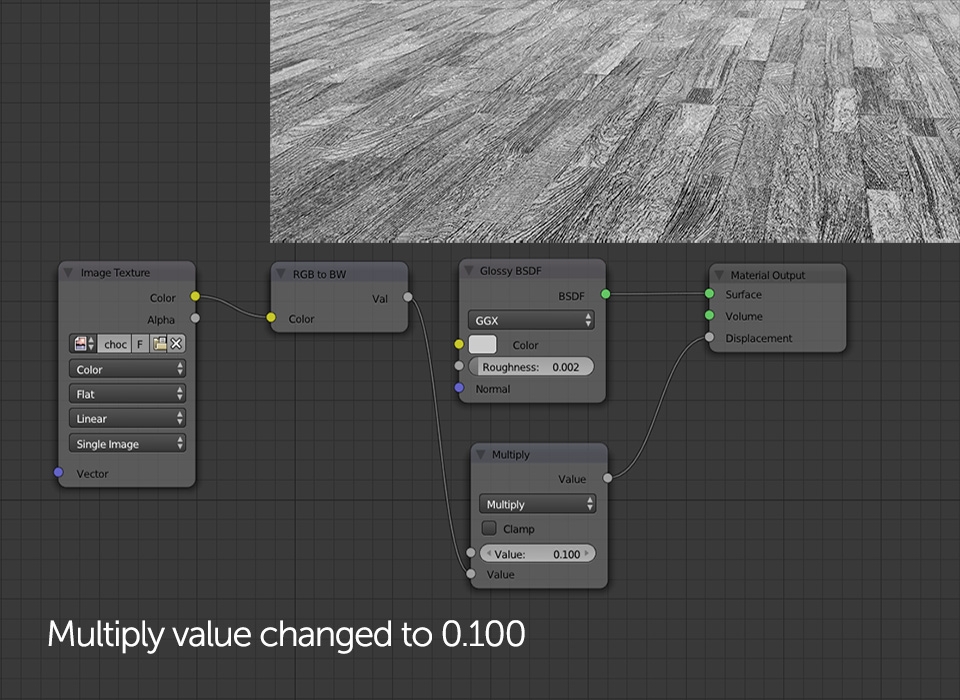
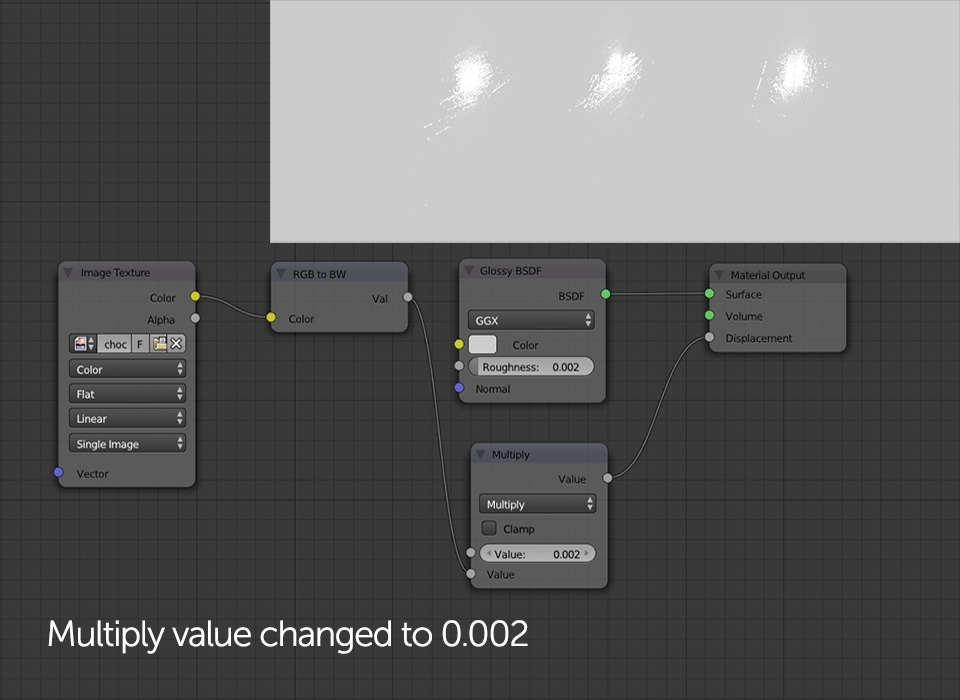
In the example above I've used Math Node for adjusting the way how image texture affects the reflectivity roughness. By multiplying the input file by 0.100 I've actually decreased its "strength" in defining the roughness of the shader. This means that all black values weren't affected much while white and light grey tones got "weaker" by 90%, getting closer to zero. Since 0.000 roughness equals perfect mirror reflections, the result also seemed more polished and reflective (picture 3). In difference to that, applying multiply value of 2.0 actually doubled color tones, not influencing only 0.00 blacks. This resulted in very matte, "rough" surface (picture 6).
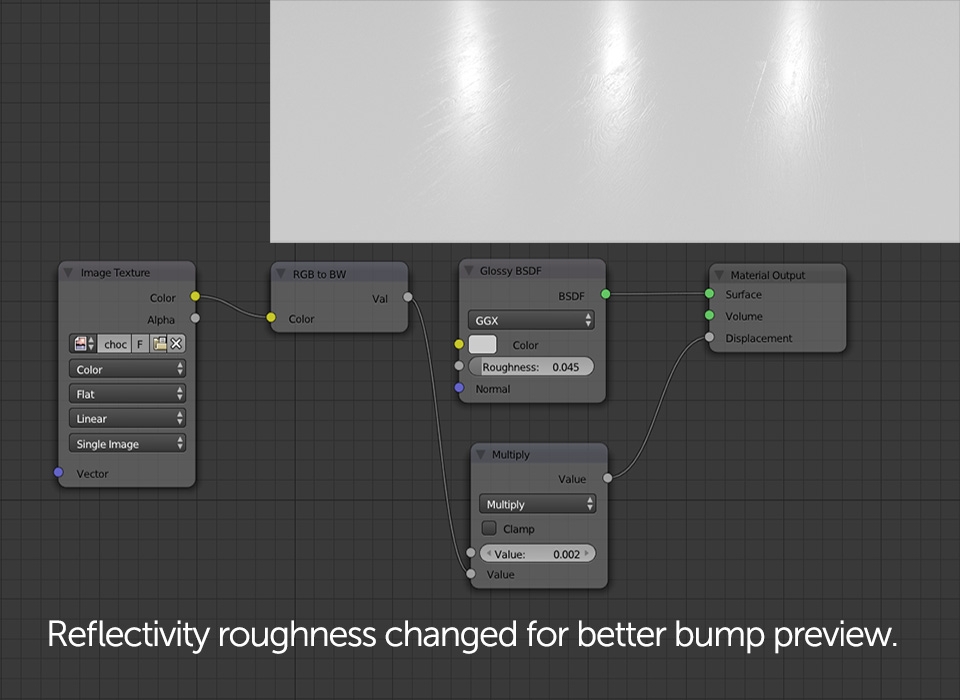
Math Node can be used for a huge amount of purposes when it comes to CG material building as it allows applying most mathematical operations to your shaders. One of them which you will actually find useful is using this node for defining the strength of bump mapping applied to the surface.

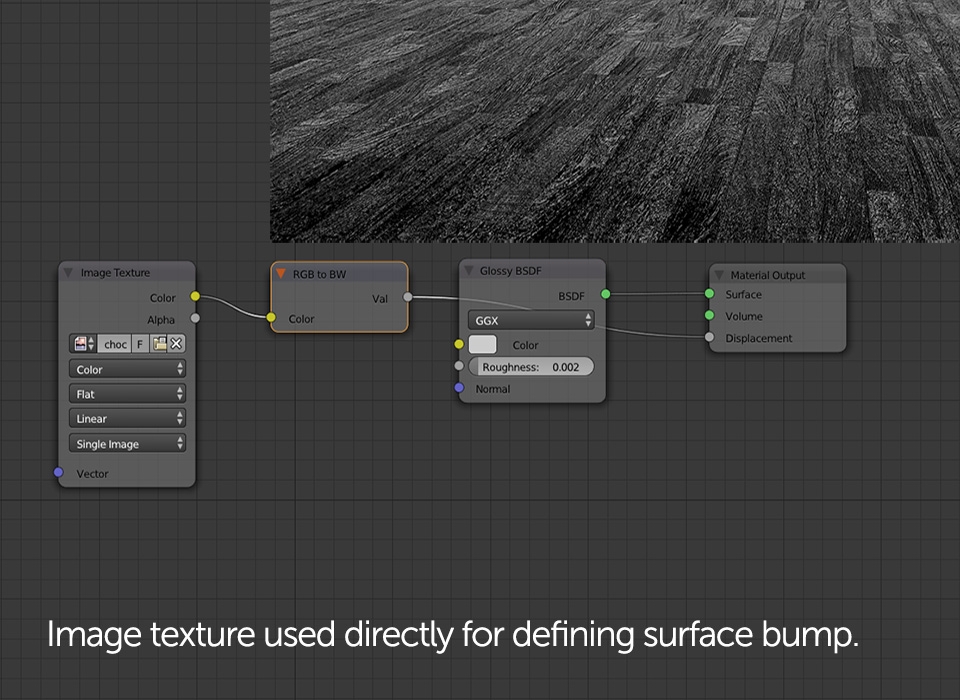
Before ending this step there are two last texture relates issues I'd like to cover. First - you might have noticed I've been using "RGB to BW" node in the example above. The reason for that (not in that particular shader as it's very simple) is saving RAM memory since I'm using Cycles with GPU based rendering only. A general texture workflow is based on a few image maps, each one assigned for simulating different material properties. This was roughly covered in the very beginning of this tutorial part. However, this method is more memory consuming as each texture has to be loaded by graphic card individually. It may not be the issue if you're using GTX Titan with 6 Gb RAM but in most cases or with scenes consisting of many shaders, each bearing three to four 6k image textures you may end up re-doing some stuff because the render won't even start. Luckily since texture map differences can be very often achieved by using basic 2D editing tools, we can also apply different Cycles Color Nodes to achieve the same effects but using only one texture input!
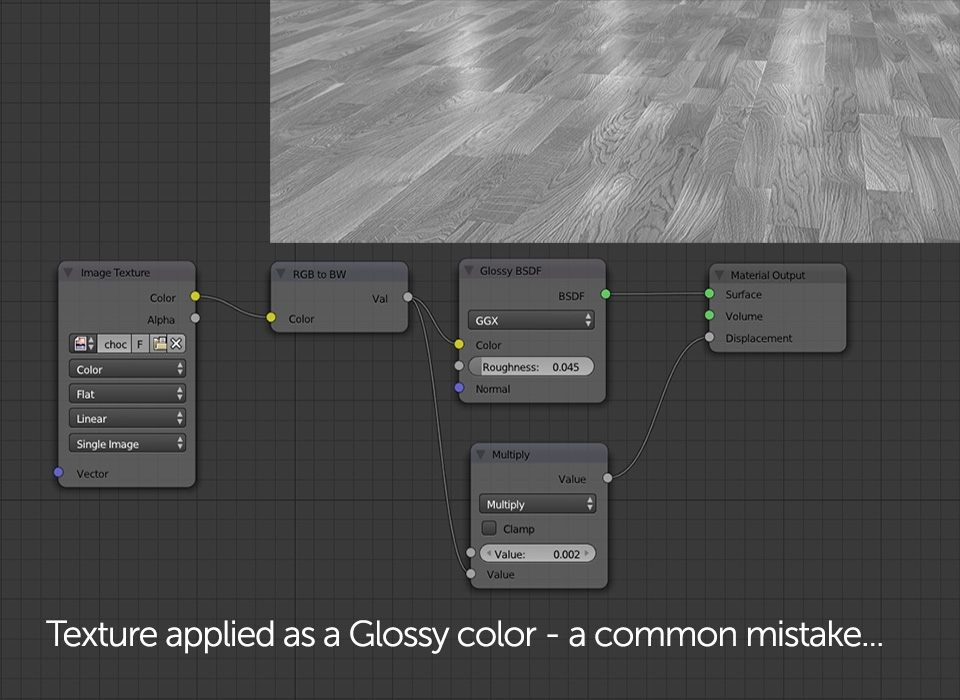
Second issue has been shown in the picture 7 of the slideshow above - it's the common mistake of using Black and White image texture as a glossy reflection color input. Take a look around - the reflection color is very uniform in vast majority of cases. It may change depending on the viewing angle, becoming brighter at very low angles, but usually doesn't have any color tint (except of metals) and is just a bit darker to the surface it reflects. Best way of testing this in real life - put a white piece of paper next to any reflecting surface and examine the paper color you see in the reflection - in most cases it will be only slightly darker, nothing else... However, reflections can be influenced by other factors we've went through already (roughness, bump etc.) and in the next step I'll try explaining how handle this correctly.